Saturday, June 10, 2006

Silence


From an abandoned cottage in the woods.
Once popular to local kids, the place was called "the 34" (perhaps inspired by a song called "this ole house"of a Swedish orchestra back in the days). The cottage saw many generations come and go. Moments of joy and anger. Laughter and heavy drinking. Love making and fist fighting. All that is over now, what is left is an empty building with destroyed furniture.
An era has ended, now there is silence.

What I have done to the image (in Photoshop 7):
-I made it B&W using the Channel mixer
-I copied the layer and added diffuse glow to the new layer, I then adjusted the opacity (once again, thanx to Mattias for that tip)
-I added grain and darkened the back of the chair
-I created a vignetting by making an oval selection, changing the feather to about 80 and darkening the selection with hue/saturation.
-The frame was created by adding a stroke to the pic, enlarging the canvas and adding some old text that I scanned from a 100 year old book to the black frame

Sunday, June 04, 2006

mr Charisma

For a couple of years ago I visited Buffalo, NY. One day I was walking through an area with some old houses, and I got to meet mr Charisma. I don´t know his real name but when going through my photoalbums I always refer to him as "mr Charisma". He was a nice man, with a nice dog. I hope he is still fine.

Friday, June 02, 2006

Reptilia

Got a little crazy today and created this monstrum. Don´t ask me why. Perhaps I was inspired by Lordi...

Wednesday, April 26, 2006

Waking up the Sleeping Buddha


In our bedroom we have a small statue called "the Sleeping Buddha". When there comes a time when you have too much time on your hands, and far too little to do, the result can be as shown above. The original pic is the smaller one on the left, and the finished result is on the right.

I photographed the statue with some roses in front of it. I then looked for some pictures of my fiancée in my archives and started my project.
This is what I did (briefly) using Photoshop 7:
- I copied the face of my fiancée to the image of the Buddha. Using Free transform, I made it the right size and rotated it correctly.
-I desaturated the image.
-I then created a new layer, which I placed at the top. The layer was created by copying the background layer and then making the eyes, nose and mouth of the statue dissapear using the clone-stamp. I used the patch-tool to make the new "non existing" face look smooth, without loosing the golden texture.
-I used layer masks on both the human face and the new "non existing" face to get them to fit perfectly onto the statue.
-I set the blend-mode of the top layer to "overlay".
-Using different layers and layermasks the face took shape. To get the face to appear more clearly I enhanced the shadows and the highlights in the picture. I found it important to use different settings of the paintbrush opacity (preferrably low values).

Creating this image took about five hours of work (breaks included).

Please tell me what you think about the result :)

Sunday, April 23, 2006

Panorama

I had a go at creating panoramas today. Here´s the result.
It consists of totally 5 images, from which I cropped the above.

In creating the panorama itself, I took the easy way and used PhotoStich (Canon Utilities PhotoStitch Version 3.1). Yes, it´s cheating. But:

I then fine-tuned the image in Photoshop 7 using
-the patch-tool,
-the clone-stamp and
-adjusting curves in LAB-mode.

I also sharpened the image in LAB-mode (sharpening the lightness-channel with unsharp mask). This I learned from the cool guys at PhotoshopTV

Wednesday, March 01, 2006

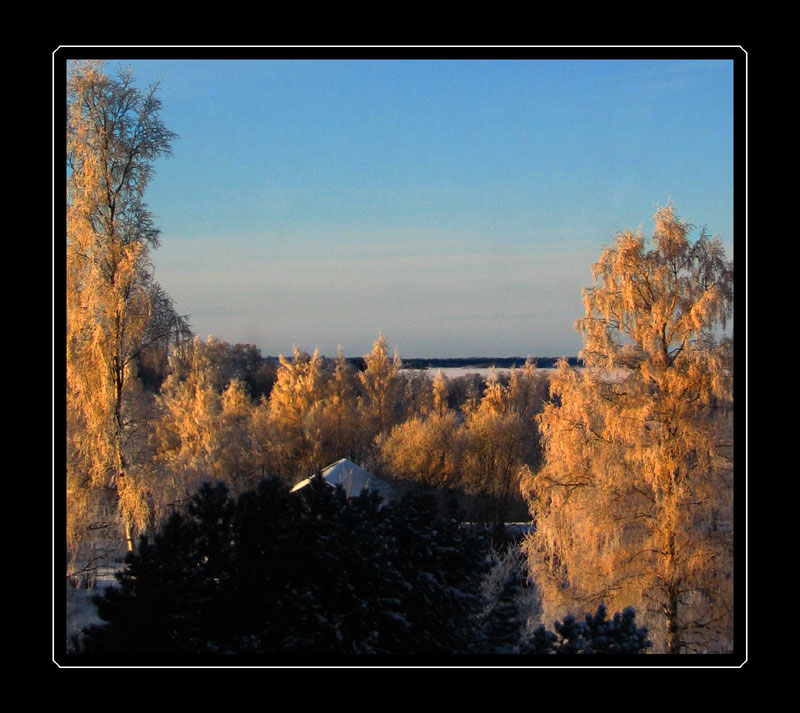
Winterlandscape

Here is a view from our kitchenwindow one beautiful morning.

And, yes, the image has been modified (slightly)

-I copied the layers (twice) and set the blend mode to multiply, I used layermasks with gradients on the darkest parts so they wouldn´t be completely black.
-I used levels to get the most out of the colours in the image.
-There was also a lamppost in the middle of the picture, but I removed it using the clone-stamp. The glass in the window was also a bit dirty and caused dark spots all over the image, but using the healing-patch solved that problem (no more washing windows for me :))
-Finally I used the sponge-tool over the trees to get a warmer feel to them.

Monday, January 30, 2006

Poster


Well folks, this is what I´ve been working on in the past few months.

I give to you: my first poster [a great roar from the audience]

The poster is for a one-(wo)man play that my fiancée is working on. And I got to create the poster (yeay...)

Layer masks, color fills, gradients and different layer styles have been my best friends (and worst aswell) for the past few months. This has been the largest project I have ever worked on. The imagefiles were just so huge; about 100 meg´s each. Any pro´s out there might laugh and say that´s nothing. But my laptop was crashing all the time.

Thursday, January 19, 2006

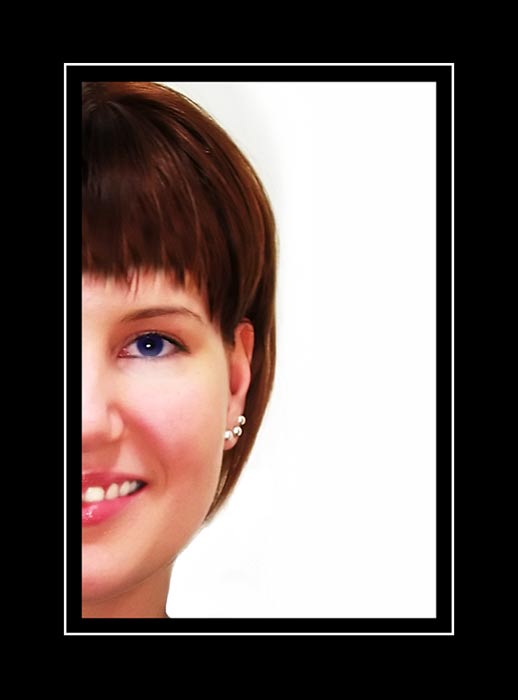
Glamour

I had a go at glamour-photo today.
The picture was actually part of a set pass-port photos of my fianceé Petra, but with some photoshop-magic, the picture came out pretty good.
So, what did I do...

Using Photoshop 7:
- I streightened the image using the measure-tool (eye to eye)
- I flipped the image to get better light on the part of the face I wanted to use
- I used Curves to get a Fiscus-effect. (Thanx Mattias for that tip)
- I added hair using the Clone-tool to get a more harmonic haircut. I also revealed more of the forehead above the eyebrow to get more focus on the eye.
-I enhanced the color of the iris using fill-layers, and setting "colorize" and opacity= about 60%
-I whitened the teeth and removed shadows under the eye using the dodge-tool
-And finally using the fine plug-in: NoiseNinja to get that Barbie-look of the skin.

Friday, January 06, 2006

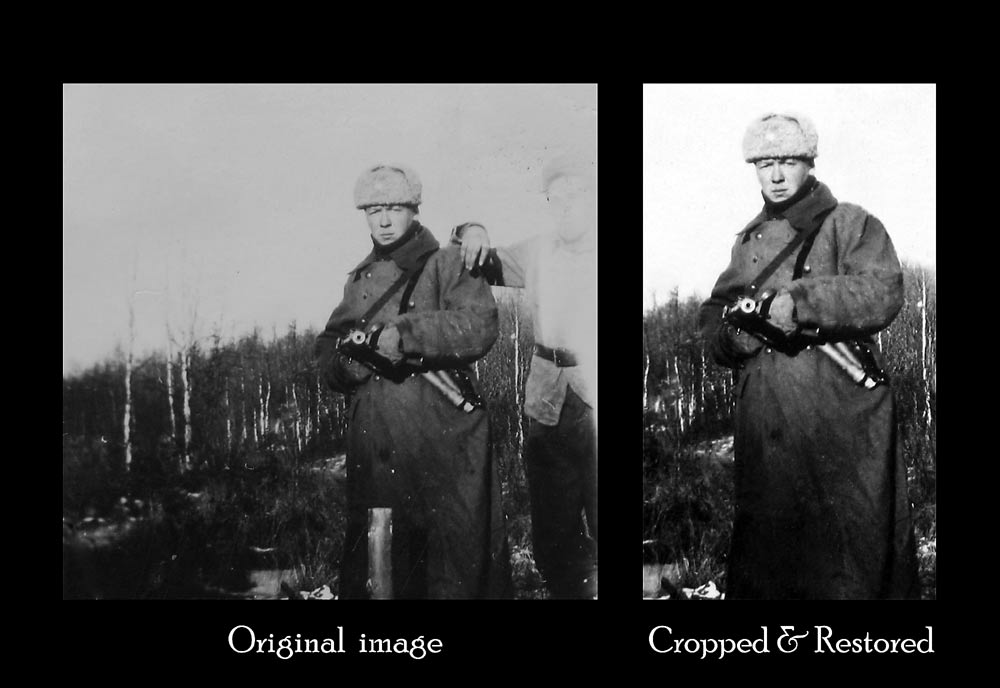
Restauration 3


Yes, I admit, guilty as charged - I´m repeating myself. But anyway...

Here is a picture of my grandfather in the winterwar.

The original image is 5x5cm small. I guess you can all see what has been done to the image; some cloning and some adjustments to both levels and color balance.

OK, I promise, no more restaurations. (Unless they are really, really good...)

Saturday, December 10, 2005

Drawing

Another image created thanks to the inspiration of mr Karlsson.

Friday, November 18, 2005

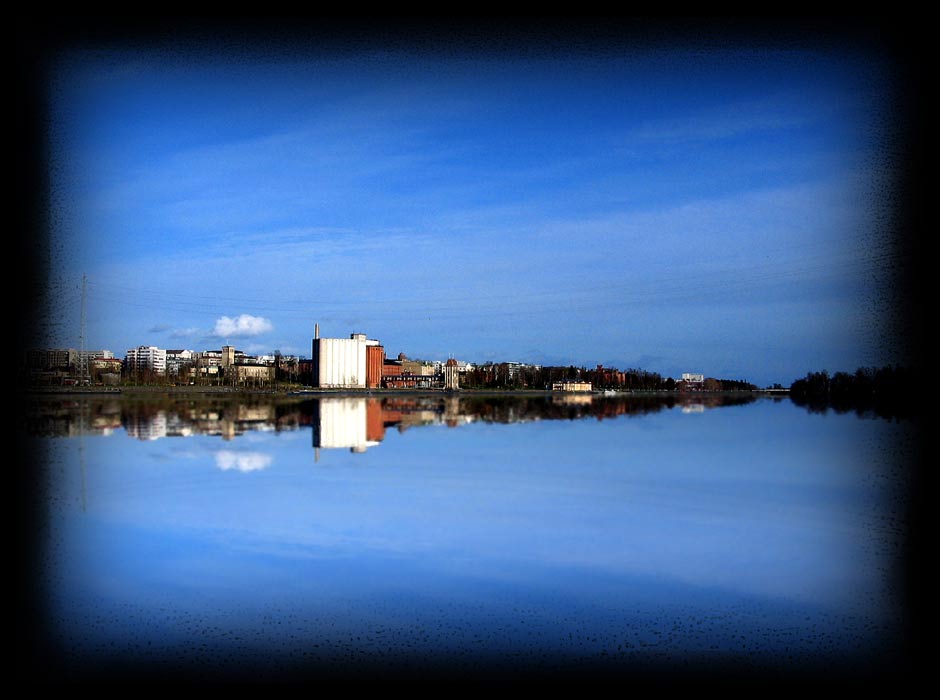
Creating reflection


Yup, it´s a cliché. But I had to give it a go.
This is the skyline of my hometown. Located beautifully by the Gulf of Bothnia. Believe it or not - the image is manipulated :)

This is how I did it using Photoshop 7 (Thanks to mr Vainamo for the inspiration)
1. I made a selection of everything above the horizon.
2. I copied the selection onto a new layer (Ctrl + J (I use a PC))
3. Using Free transform I chose Flip Vertical and then fitted the new layer to the rest of the image to create an illusion of reflection.
4. To make the reflection more realistic I blurred it.
5. The frame was created using filters (poster edges). The selection feathered to about 50. Some good old fiddling with the Wacom tablet was also necessary.

Friday, November 11, 2005

Restauration 2

Another restaurationproject. The original image on the left dates back to the end of the 19th century. It is the only picture of my grandmothers grandfather. As it was badly damaged, I had to copy bodyparts from other pictures of old relatives, in hope of getting a realistic picture.
I am well aware of the fact that the image on the right only depicts a possible image of my late relative, but at least it´s a picture you can put in your familyalbum.
Clone-stamp and layer masks were heavily in use.

Sunday, November 06, 2005

Restauration

My sweet old grandma handed me an old picture (taken sometimes in the 1920´s...) and asked if I possibly could do something about it as it was all wrinkled and mistreated.
-Who would say no?
I did my best, and even took it a bit further and colorized it as well.

If you´re curious about how it´s done, visit the links on the right.

In memoriam

In memory of those before us. Their blood, sweat and tears made it possible for us to live the way we do.

Saturday, November 05, 2005

Montage:Replotbridge

One of my first montages. The famous Replotbridge. Picture taken on a sunny afternoon and edited on a rainy night. Credits to Mattias Karlsson for inspiration and tips.