Thursday, December 13, 2007
Friday, November 16, 2007
Sunday, August 26, 2007
HDR (or atleast a good fake)
I´m amazed. Really! I was browsing on Fotosidan and found this tutorial on creating "fake" HDR´s in Photoshop. The tutorial is created by Magnus Rydström, a guy whose blog I read on a daily basis.
This is the image I started with...

... and this is what I ended up with

This is so COOL! I´ve been admiring the images on Ben Willmores blog, and envying his technique. I stay humble and own great respect for mr Willmore - but I´m pretty darn happy with this result :)
Thanks Magnus. This is super.
This is the image I started with...

... and this is what I ended up with

This is so COOL! I´ve been admiring the images on Ben Willmores blog, and envying his technique. I stay humble and own great respect for mr Willmore - but I´m pretty darn happy with this result :)
Thanks Magnus. This is super.
Tuesday, July 24, 2007
Operation: Free Koodi
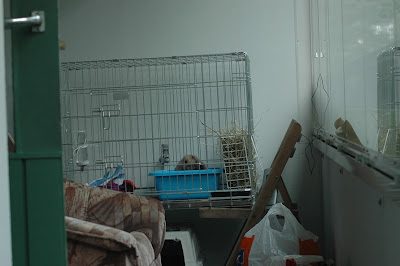
From this
 To this

 To this
This is a pic by a friend of mine. Her late rabbit, Koodi, is inside the cage. My mission was to remove some disturbing elements such as the cage and the couch. The techniques used are pretty much the same as in "Removing reflection" but for this piece I had to use different techniques to create a lighting so that everything would look realistic. I was also forced to use another image to get the face of the rabbit to look real.
Monday, May 07, 2007
Removing reflections

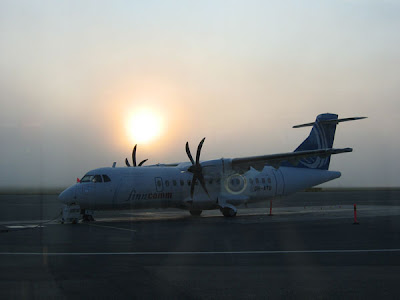
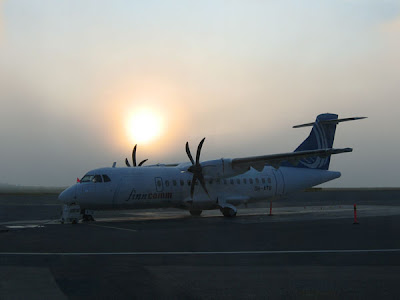
Above is the original picture of the ATR 42-500, a FinnComm airliner on the runway in Kuopio, Finland. The sunrise is beautiful and the mood is magical with the plane in the mist. Unfortunately the photographer (a friend of mine) is visible as a reflection in the window. So, I was asked to do something about it. I must say the project was challenging. You can see the result below.

How I did it? Well, that´s a long story. For this project, the healingpatch sure came in handy.
-I created a new layer, chose a good color with the colorpicker and painted in the reflections. I was careful not to paint too large areas at once. I then control-clicked the layer, making a selection, merged the two layers by pressing ctrl-e, and changed the tool to the healingpatch by pressing the j-key. I dragged the selection to an area where the structure was similar to the area I was recreating.
The sky was hard to fix. So I ended up making a selection with the magic wand and creating a gradient where I picked the foreground-color with the colorpicker from the darkest part of the sky and the background-color from the light part of the sky. Some serious masking let the sun through while hiding some nasty reflections.
The clonestamp was used on some parts of the fuselage, I used low opacitysettings to avoid sharp edges.
A part of the runway was recreated by painting in the area with a good, dark color, adding noise and changing the opacity to about 30%.
Wednesday, January 03, 2007
All I want for Christmas is... Photoshop

Here´s what I gave my mom this Christmas. A coffemug with her two newly-adopted cats. Pictures 1 and 2 were taken with the 3 megapixel camera in my Nokia N80. The camera in the phone is a nice toy but that´s all. The quality is crappy and I almost busted my ass off trying to get the cats to look somewhat normal in the pic (number 3) I sent to be burned on the mug (which is also photographed with the Nokia). I also had to recreate a piece of the ear of the B&W cat.
The mug came out pretty good, though. And my mom was happy, and that is ofcourse the most important thing.
Subscribe to:
Comments (Atom)


